Are All Smoke Detectors Alike?

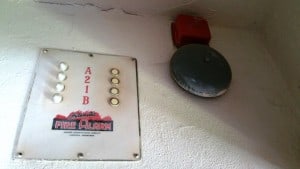
Most people assume a smoke detector is a smoke detector…this is not true.

In the mid 1970’s less than 10% of homes had a smoke detector; now over 90% do. Nevertheless, this dramatic increase in smoke detectors has had little impact on the risk of death by fire. Why? Some studies have indicated that many smoke detectors are either inoperable or have been disabled. Nuisance alarm activations are a major reason why detectors are disabled. National Fire Protection Association, NFPA, studies have indicated ionization alarms account for over 95% of all nuisance alarms.

Another reason is the age of the smoke detector. All smoke detectors should be replaced every 10 years.

What are the statistics on ionization vs. photoelectric smoke detectors?

62-1
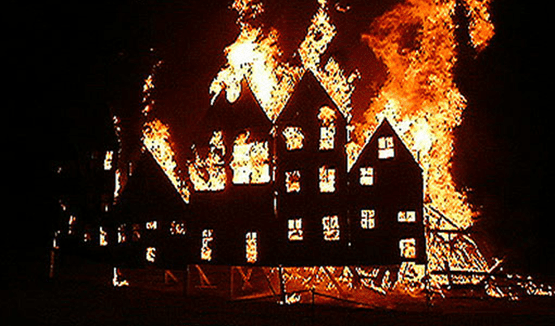
The majority of residential fire fatalities are due to smoke inhalation. Ionization detectors respond an average of 15 to 50 minutes slower than photoelectric. Some studies indicate they completely fail to work 25% of the time. However, ionization detectors respond faster in fast flame fires. Studies show 30 to 90 minutes quicker than photoelectric. Certainly, either smoke detector is better than none at all. Of course, a functioning smoke detector is most important. But if time and reliability are vital to our chances of surviving a smoldering fire, a photoelectric smoke detector is the best type to install in your home.

Less than 10% of all smoke detectors in homes are photoelectric.

Doug Hastings
MN Home Inspector, Minneapolis & St. Paul
ASHI Certified Inspector, ACI
Kaplan University, Home Inspection Lead Instructor

Faulty Smoke Detectors

In a fire, the issue is time.

Minutes and many times seconds will make the difference between life and death. The combustible materials in our homes are different from the past and the technologies of smoke detectors have also changed. There are two types of smoke alarms, ionization and photoelectric. 90% of homes have ionization smoke detectors installed; about 5% are photoelectric and the rest have no alarm at all. The type of smoke alarm can be the difference between your family getting out of the house in time or not.

To better understand the importance of this; there are two types of residential fires, ‘fast flame and smoldering’. The vast majority of residential fire fatalities are due to smoke inhalation from a smoldering fire. And almost two-thirds of these fatalities occur at night while the occupants are sleeping. Photoelectric smoke detectors are by far the best for smoldering fires. Ionization detectors are very slow to respond to smoldering fires. Actually, Ionization detectors have proven to be significantly less reliable in both ‘fast flame and smoldering’ fires.

61-1What type of smoke detectors do you have in your home?

Daylight saving time is a great time to change the batteries in your smoke detectors. This year you should also examine the label on the back of your detectors. If the label says anything about radioactive material, Americium 241, or model number has an “I” then it is ionization. You should replace these detectors with photoelectric. More facts will be in next week’s blog.

All smoke detectors are not alike. Make sure you are protecting your family with the best fire alarm possible.

Doug Hastings
MN Home Inspector, Minneapolis & St. Paul
ASHI Certified Inspector, ACI
Kaplan University, Home Inspection Lead Instructor

Radon Testing Protocols

Does your radon tester follow the EPA guidelines?

In a real estate transaction most radon tests are performed by the home inspector. There is nothing wrong with that, but there is the assumption that they are doing it ‘right’. This may or may not be true. The proper testing protocol you should expect is the following:

  • Homeowner contacted to discuss the test and EPA rules.
  • The house closed up, doors and windows shut, a minimum of 24 hours before test.
  • Set the monitor at the lowest potential habitable level of the home.
    •    Approximately 3’ to 6’ off the floor.
    •    Centrally located and not on outside walls.
    •    3’ from a furnace supply or return air register.
    •    6’ from a fireplace.
  • A notice describing the do’s and don’ts left on the kitchen counter.
  • A notice at all entry doors reminding people to keep the doors closed.
  • Short term tests should be between 48 and 72 hours long.

EPA guidelines are not regulated by the state of MN.

Unless you are certain about who is doing your radon test, you should ask for a copy of their certification and a document verifying the monitor has been calibrated within the last year. An electronic tamper-proof monitor is the best way to assure accurate test results.

A faulty test puts the home’s occupants at high risk.

Doug Hastings
MN Home Inspector, Minneapolis & St. Paul
ASHI Certified Inspector, ACI
Kaplan University, Home Inspection Lead Instructor

‘Like’ our Facebook page and Cities Inspection will keep you informed on a radon inspections in MN.

Controlling Radon Gas

In Existing Homes:

After testing for radon and if the level exceeds 4.0 picocuries, the next step is to begin mitigation. You should look for a ‘certified mitigation contractor’. They will have completed the EPA required training and testing. In a nutshell mitigation for an existing home includes the following:

  • Cover all exposed earth with a 6 mil poly and seal all edges.
  • Caulk all cracks and openings in the floor slab.
  • Put a 3” pipe in the earth, thru the floor slab, or in a sump.
  • Install the pipe inside or outside the house.
  • Extend the pipe a 12” above the surface of the roof.
  • Pipe must terminate minimum of 10’ from a window
  •  Pipe must terminate 10’ from another home.
  • Re-test and verify a level of 4.0 picocuries or less.

In New MN Homes:

There is no preliminary testing. The state requires either a passive or active system that consists of the following construction requirements:

Below the floor slab a minimum of 4” of gas –permeable aggregate or sand.

  • Cover the sand or aggregate with a minimum 6 mil poly overlapped a minimum of 12”.
  • All penetrations thru or joints in the slab must be caulked.
  • Hollow core blocks must have at finished grade a solid course of blocks.
  • Exterior walls of foundation must be dampproofed below grade.
  • Ducts below the slab must be continuous or sealed.
  • A plumbing tee inserted below the floor slab and poly.
  • A minimum 3” pipe extended thru the building and marked as radon pipe.
  • Pipe must terminate 12” above the roof and a minimum of 10’ from a window or another house.
  • A fan (active) is optional.  No fan (passive) or radon testing is required.

Radon gas is real…this hazard should be taken seriously.

Doug Hastings
MN Home Inspector, Minneapolis & St. Paul
ASHI Certified Inspector, ACI
Kaplan University, Home Inspection Lead Instructor

‘Like’ Cities Inspection’s Facebook page for more great tips on things to watch for in your home!

No More Debate…Radon Kills

Radon mitigation is part of the MN State Building Code. 

What does it mean when the MN State Building Code is modified to include radon mitigation methods as a requirement to build a house? Building codes are ‘minimum’ safety standards for construction. This says a lot about how dangerous radon gas is. It is no longer a scientific theory, it is a reality. Most of MN is designated as having radon amount levels greater than the EPA standard 4.0 picocuries. And did you know the EPA standard may soon be lowered to 2.0 picocuries.

Radon disclosure is part of the MN Real Estate Disclosure Statement.

There is misinformation about how radon gas travels. Too many people think that if their neighbor has a low radon level in their home it means they must too. It doesn’t work that way. Radon concentrations are a combination of soil decay, construction methods and materials used in building each home, and the occupant’s use of the house. Together these factors contribute to elevated radon levels. For these reasons and more, MN now requires disclosure of any radon testing that has occurred in a home being offered for sale. Unfortunately, there are no rules regulating radon testers; that part is still buyer beware.

Radon testing is not regulated in the state of MN. 

Make sure your test is performed by a nationally ‘certified’ technician using the highest quality, calibrated, and tamper-proof electronic monitor.

Doug Hastings
MN Home Inspector, Minneapolis & St. Paul
ASHI Certified Inspector, ACI
Kaplan University, Home Inspection Lead Instructor

Radon Gas is a Proven Danger

January is National Radon Awareness Month.

Radon gas and real estate don’t mix well. The more energy efficient we make our houses the greater the risk of developing radon induced lung cancer. The radon gas health concern is no longer debatable; it is the #1 cause of lung cancer for non-smokers and the #2 cause for smokers. MN homeowners, real estate agents, builders, and home inspectors should do all they can to identify, assess, and resolve this ever present threat to our families.

Most people know that radon gas is a colorless, odorless gas that occurs naturally in the decay of soil below all houses throughout the U.S. What most people don’t know is the southern and central portion of MN is designated by the national building code as Zone 1 having the highest potential for elevated radon levels in the basement, main and upper levels of our homes. Because our senses are not aware of its presence, this danger has long been overlooked and ignored.

Times have changed.

Some have argued the rapid increase in radon awareness is attributable to the “me” generations X and Y concern for themselves and their children. Maybe so, but there is a huge increase in ‘boomers and grey’s’ having their homes tested too. A possible reason could be their concern for children and grandchildren. Or maybe everyone just wants to live a longer and healthier life. For little money and inconvenience everyone can have their homes tested for radon. It takes only 2 days and all you have to do is keep your windows closed. That’s why January through March, the heating season, is the best months to perform a test.

It might be time to have your home tested!

Doug Hastings
MN Home Inspector, Minneapolis & St. Paul
ASHI Certified Inspector, ACI
Kaplan University, Home Inspection Lead Instructor


3 Fire Proof Bypasses

Fire barriers are often compromised and the homeowner never knows it.

Home fire barriers have been a part of the building code since about 1960.  Homes built prior to that time were not required to have any fire protection and many different fire proofing methods have been added since then.  Fire safety is a big part of building codes as it should be.

Did you know that most house fires start in the garage?

Most of the time even old homes have been modernized with many current fire barriers in place.  Three of the most common breaches in the garage fire barrier are:

    1. Pull down attic stairs
    2. Clothes dryer and bath fan exhaust fan vents
    3. Furnace heat ducts

The bottom of attic pull down stairs is plywood and when closed this does not provide an adequate fire barrier.  The solution is to install fire rated sheetrock on the plywood cover.

For exhaust vents and heat ducts it’s as simple as extending the pipe through an outside wall and building a fire rated box around the pipe.


These simple garage improvements will protect the home against a fire entering the house.

Doug Hastings
MN Home Inspector, Minneapolis & St. Paul
ASHI Certified Inspector, ACI
Kaplan University, Home Inspection Lead Instructor

‘Pops’ Rob Leslie
Kaplan Professionals, Retired


If you are interested in more home inspection info – ‘like’ Cities Inspection’s Facebook page.

Aluminum Wiring = Trouble

Because of the high cost of copper, electricians began using aluminum wiring between 1968 and 1974.

Determining that a house is wired with aluminum is not as easy as it may seem. You might start with determining if the electrical panel was installed during the period in which solid aluminum wiring could have potentially been used. After that only a seasoned home inspector or a certified electrician should check to see if the wiring actually is solid aluminum and if that wire has caused heat damage.

To start, you must look at the cut end of the wire to determine if it is a solid or coated wire. Silver wiring is not necessarily aluminum.  It could be copper wire with a tin coating. Similarly, copper wire may not be what it seems. Aluminum wiring was sometimes coated with copper to prevent a chemical reaction between the aluminum wire and its mounting hardware.

The main concern is aluminum wire alloys, produced in the period 1964 to 1981, expanded more than copper wire when they got hot and shrank more when they got cold. This continual expansion and contraction caused loose connections, overheating and eventually house fires.

What should I do if my house has aluminum wiring?

The best solution is to completely rewire the home. This can be very expensive, so there is a code approved alternative. Copper pigtails (a short copper wire) can be connected to the aluminum wires, creating a bond between the approved devices and the wire. This bond will stay secure and prevent overheating.

There are two devices approved to bond the copper pigtails to the aluminum wire. The best is a COPALUM connection which is a form of cold welding and can only be performed by a trained and certified electrician using specialized tools. This is a very costly process. The next best is AlumiCon connectors which are a newer, simpler and less costly alternative, to COPALUM. These devices also must be installed by a licensed electrician.  Amateur installation of AlumiCon connectors is not approved because improper bonding of the wire to the connector can cause serious overheating.

Never let anyone attempt to connect the copper pigtails to aluminum wire with a wire nut. This method has been extensively used in the past. It will absolutely cause overheating and maybe a house fire!  

Aluminum wiring is an issue that should be addressed immediately. Start by calling an ACI Certified Home Inspector for analysis.

Doug Hastings
MN Home Inspector, Minneapolis & St. Paul
ASHI Certified Inspector, ACI
Kaplan University, Home Inspection Lead Instructor

‘Pops’ Rob Leslie
Kaplan Professionals, Retired


‘Like’ Cities Inspection’s Facebook page for more great tips on things to watch for in your home!

Let’s Look Closer At Deck Failure!

There are just two basic reasons for decks failing. The first is overloading and the second is improper construction.

Overloading: deck failure usually happens unexpectedly. We have been using the deck for several years, even barbecuing for the family without a problem. But today we are having a graduation party. Fifty teenagers’ crowd the deck which has never carried more than seven people! The music starts, the teenagers jump up and down, and the deck tears off the rim joist with the deck collapsing towards the house. Unfortunately several people are hurt.

What happened? Floor loads in a house are limited to 40 pounds per square foot or a point load of 300 pounds. That limit is designed to carry some furniture and people walking or sitting in the room. Decks are usually designed to the same limit so our deck was grossly overloaded with a large number of people on it, and absolutely could not carry the extra shock load of the teenagers’ dancing . The reason the deck failed where it is connected to the house (or the rim joist) is that this is the point where the entire load is perpendicular to the direction of the fastener. It is like suddenly smacking the fastener with an ax.

Party on the deck, by all means, but have it checked for structural integrity to be sure that the extra load can be carried. Pay particular attention to the rim joist, which should be bolted in a manner that pulls the deck floor joist and the house floor joist together. Proper hardware and an installation guide are available from your local big-box store.

Improper construction: every existing deck should be inspected to see that it has been properly constructed. Unfortunately, many contractors and local building officials do not appreciate that proper deck construction is even more important than it is in a house. The deck at some point will carry greater loads than the house floor and is being continually attacked by the weather where it has to contend with sun, rain and snow loads.

Any home inspector can determine if your deck is capable of carrying the loads required. Most often a contractor will be able to reinforce the existing structure without the need of building a new deck.

Doug Hastings
MN Home Inspector, Minneapolis & St. Paul
ASHI certified inspector, ACI
Kaplan University, Home Inspection Lead Instructor

‘Pops’ Rob Leslie
Kaplan Professionals, Retired


‘Like’ our Facebook page for interesting info on inspections and property issues!


Wood Deck Failures

What happened to pressure treated deck lumber?

Pressure treatment is a process that forces chemical preservatives into the wood. The wood is placed in a closed cylinder and pressure is applied to force the preservative into the wood. Preservatives protect wood from decay and insect damage. There are 3 classes of wood preservatives; the waterborne method is typically used in residential construction. For decades the lumber industry successfully used CCA, chromated copper arsenate, as the preservative of choice. However negative publicity regarding the arsenate caused the wood product industry to voluntarily transition away from CCA to alternative preservative systems. CCA has no longer been used residentially since December 2003. A number of alternative preservatives are available. The most recognized are ACQ, alkaline copper quad, and CA, copper azole.

Testing has indicated that ACQ and CA are more corrosive to steel and the protective coatings applied over steel.

In other words, the old galvanized nails, screws, metal hangers and connectors were no longer approved for use with the ‘new’ pressure treated wood. Unfortunately, either nobody told the builders and lumber suppliers or they just didn’t care. Hot-dip galvanized or stainless steel fasteners and hardware are the recommended products to use. The structural stability of the wood deck depends upon using these approved fasteners.

When you see rusted nails, bolts, and other metal hardware on a wood deck, it is a big problem.


Doug Hastings
MN Home Inspector, Minneapolis & St. Paul
ASHI certified inspector, ACI
Kaplan University, Home Inspection Lead Instructor

‘Pops’ Rob Leslie
Kaplan Professionals, Retired


‘Like’ our Facebook page and we’ll keep you informed on a variety of housing topics!

Decks Can Be Dangerous

Deck failures are becoming more common. Why do decks fail?

The most common reasons are:

  • Old age
  • Poor design
  • Improper materials
  • Overloading

Decks should be inspected annually. All lumber should be inspected for rotting, particularly where posts meet the ground, at joist unions, and the ledger board connection to the house. Most of this rotting is caused by old age, moisture, and lack of maintenance.

However, much of the rotting is coming from fasteners and connectors that are incompatible with the type of wood preservative the deck lumber was treated with. Rusted heads on nails, screws, or bolts connecting metal joist hangers are an indication that these fasteners or connectors have failed. This was caused by a chemical reaction between the metal hardware and the pressure treated wood. This form of failure is the number one reason for decks collapsing.

Unfortunately, there is great confusion as to which fasteners and connectors are to be used with what type of lumber. The best choice is stainless steel, but it is also the most expensive and difficult to obtain. The most commonly used nails, screws, bolts, and metal hangers are hot dip galvanized. These are a good, available, and lower cost choice. The thicker the galvanized coating the better and longer the metal hardware will perform. Other approved materials, similarly priced to hot-dipped galvanized, are silicon bronze and copper.

Deck collapses are often related to overloading or lateral movement. This two conditions place a great amount of stress on the deck fasteners and connectors. Therefore, whenever rust is seen on nails or screws, they should be removed for inspection or replaced.

Avoid a disaster inspect your deck each year.

Doug Hastings
MN Home Inspector, Minneapolis & St. Paul
ASHI certified inspector, ACI
Kaplan University, Home Inspection Lead Instructor

‘Pops’
Rob Leslie
Kaplan Professionals, Retired

Have you liked our Facebook page  yet?

Too Much Roof Snow?

Can my roof collapse from too much snow load? It’s possible, but highly unlikely.

Since about 1950, cold climate states must adhere to engineering principles that configure the structure of the roof. They are based upon the highest potential roof snow load in your area. The building code will then require the roof be designed and sized to safely meet or exceed those live snow loads. In Minnesota that load is 42 pounds per square foot north of a line that crosses the state just south of Hinckley. The south side of the line which includes Minneapolis and St Paul is 35 pounds per square foot.

How deep would the snow be if there was 35 pounds of snow per square foot on the roof?

Well…if it was light snow it would be 5 feet deep! If it was medium or normal density it would be 2.5 feet deep and if it was tightly packed, it would be more than 1.5 feet deep. The measurement by the way would be uniform over the whole roof. In the real world there will be places that are less deep or less dense. These include areas that are covered by roof overhangs, spots protected from wind, and behind chimneys and dormers. So, if your roof meets current code, you have little to worry about.

However, if your home is hundred years or so old or you have some reason to doubt that it has been built to code, you may wish to remove some snow. Remember though, if you are removing snow you are removing a very good insulator.

If you must remove snow use a roof rake with extension handles. Never stand on the roof or scrape the roof bare as this may damage the shingles. Be very cautious about letting someone who comes knocking on your door remove the snow from your roof. Check their credentials. Make sure they have insurance.

This could become a very expensive mistake!

Doug Hastings
MN Home Inspector, Minneapolis & St. Paul
ASHI certified inspector, ACI
Kaplan University, Home Inspection Lead Instructor

Rob ‘Pops’ Leslie
Kaplan Professionals, Retired

Is Your Life Worth $25?

This very cold winter has been responsible for many accidents, including deaths from CO (carbon monoxide) poisoning. 

These disasters might have been averted if a properly located and operating carbon monoxide alarm had been installed. For just $25 a battery-operated or for $50 a hardwired alarm can be purchased and installed.

What is CO?  Carbon monoxide is a toxic gas that is tasteless, odorless, invisible, and none irritating gas. It also weighs approximately the same per cubic foot as the air in your house. If it is going to poison you, you won’t know anything about it!

What causes CO?  CO is a product of incomplete combustion due to an insufficient oxygen supply. This can occur by not supplying a fossil fuel burning appliance with enough air. Your furnace, water heater, fireplace, automobile either needs to be located in a wide open space or have an outside air supply. There are formulas for how big an open space is needed, but by installing an outside air supply you are assured of having sufficient air for complete combustion. Or carbon monoxide occurs when fossil fuel appliance burners are incorrectly tuned or when the burner exhaust system is blocked or leaking. In other words you are re-burning the original exhaust products. A safe appliance produces carbon dioxide (CO2). Only when there is not enough oxygen in the air or when you re-burn oxygen from the CO2 does the appliance become a CO producer.

All homes should have a CO detector within 10’ of all bedrooms.

What is the action level?  Obviously you would like to have zero CO in your house. But that may not be possible; you should expect a level of less than 15 ppm in your home. Exposures at 100 ppm (parts per million) or greater can be dangerous to human health. At this level the symptom would be a slight headache in 2-3 hours of exposure. People who survive CO poisoning and complain of low to severe headaches and nausea are lucky. They just got a relatively low dose of this insidious poisoning. Elevated levels of CO will simply kill you before you know anything about it.

All systems that burn fossil fuels… Oil, Gas, Wood… should be examined and tuned by an expert annually.

Doug Hastings
MN Home Inspector, Minneapolis & St. Paul
ASHI certified inspector, ACI
Kaplan University, Home Inspection Lead Instructor

Rob ‘Pops’ Leslie
Kaplan Professionals, Retired


4 Top Tips to Keep You & Your Home Safe for the Holidays

What is the #1 cause of house fire?

The answer is electrical wiring. During the holiday season wiring to Christmas lights and trees are particularly dangerous. Some tips to keep you safe are:

  1. Carefully inspect light strings each year and discard any with frayed cords, cracked lamp holders, or loose connections.
  2. When replacing bulbs unplug the light string and match voltage and wattage to the original bulb.
  3. For exterior lights use only those rated for exterior use.
  4. Both interior and exterior lights should have an Underwriters’ Laboratory label.
  5. When connecting multiple strings of lights check how many can be safely strung together according to the manufacturers specifications or UL listing.
  6. When hanging outdoors lights keep electrical connectors off the ground and away from metal gutters and overhangs.
  7. Never connect more than one extension cord together. Don’t use extension cords that are too long. Never install an extension cord under a rug or near a heat source.
  8. Make sure each outlet you plug into is not overloaded.
  9. Always turn off lights when you leave the house or going to bed.

What is the #2 fire hazard?

Over 40% of all home fires are caused by defective heating equipment. If you haven’t already, you should schedule a tune up and safety check of the water heater, furnace or boiler before Christmas. Be sure the heat exchanger, the vent and flue are inspected. These are the primary causes of fire or CO poisoning.

Don’t forget to inspect both gas and wood burning fireplaces for condition and safe operation. Use a screen or glass door and never leave any fireplace unattended. Don’t burn gift wrappings, tissue, or evergreens in the fireplace.

#3 Keep your Christmas tree away from the fireplace, keep water in the base, and turn off the lights when you leave the home unattended.

#4 Check your smoke and carbon monoxide detectors.

Enjoy this very special season!

Doug Hastings
MN Home Inspector, Minneapolis & St. Paul
ASHI certified inspector, ACI
Kaplan University, Home Inspection Lead Instructor

Rob ‘Pops’ Leslie
Kaplan Professionals, Retired

Safety Alert!!! Frozen Gas Meters

This week I was reminded of how dangerous this time of year can be in the northern states. With snow and ice thaw and then re-freeze, gas meters become a very BIG safety concern.

Who looks at their gas meter?

The answer is nobody…unless there’s a problem. Every year MN home inspectors come across frozen or snow blocked gas meters. Frankly, unless this condition is corrected a seasoned home inspector wouldn’t enter a home until this condition is fixed. It’s simply too dangerous!

In Minneapolis, St. Paul, and most all communities, there are two locations for natural gas meters. The older meters are located inside the house and obviously do not present themselves as a winter concern. Not so fast, if these interior meters have a regulator, this must be vented to the outside of the home.

A regulator on a gas meters indicates the local utility is supplying the house with high pressure gas. Are you beginning to get the picture? Is the house speaking to you? High pressure gas needs to be vented to the outside of the building. If the vent pipe is blocked by a pile of snow, oh my, this could be a MEGA problem.

Modern meters are installed on the outside of the home. There are good and bad locations for these meters. For example they shouldn’t be under the drip line of a roof or in areas that accumulate piles of snow. In these situations the meter regulators could become buried or frozen. When blocked, there is a good chance that gas fumes could build up and an explosion could occur.

So go outside today and check out your meter or the vent opening and verify the snow and ice has not blocked it.

Be safe…

Doug Hastings

MN Home Inspector
Minneapolis & St. Paul

Kaplan University
Home Inspection Lead Instructor

Categories

BLOGS BY CATEGORY